For most of us, T-shirts are a wardrobe staple, as they are a versatile, classic piece of clothing that stays in style. You can wear them throughout the year without getting bored. Some people like to wear T-shirts that truly depict their personality. Customized T-shirts are a great way of doing that, but they are costly.
With the help of a Cricut machine, Heat Press, and a few other items, you can create customized T-shirts. In the past, Heat presses used to be big and bulky, but that’s not the case now. Cricut redesigned the heat press technology and came with not just one but two unique products, Cricut AutoPress, and Easy Press. This blog will discuss the Cricut Heat Press features and how it differs from other heat presses.

Cricut AutoPress: Overview
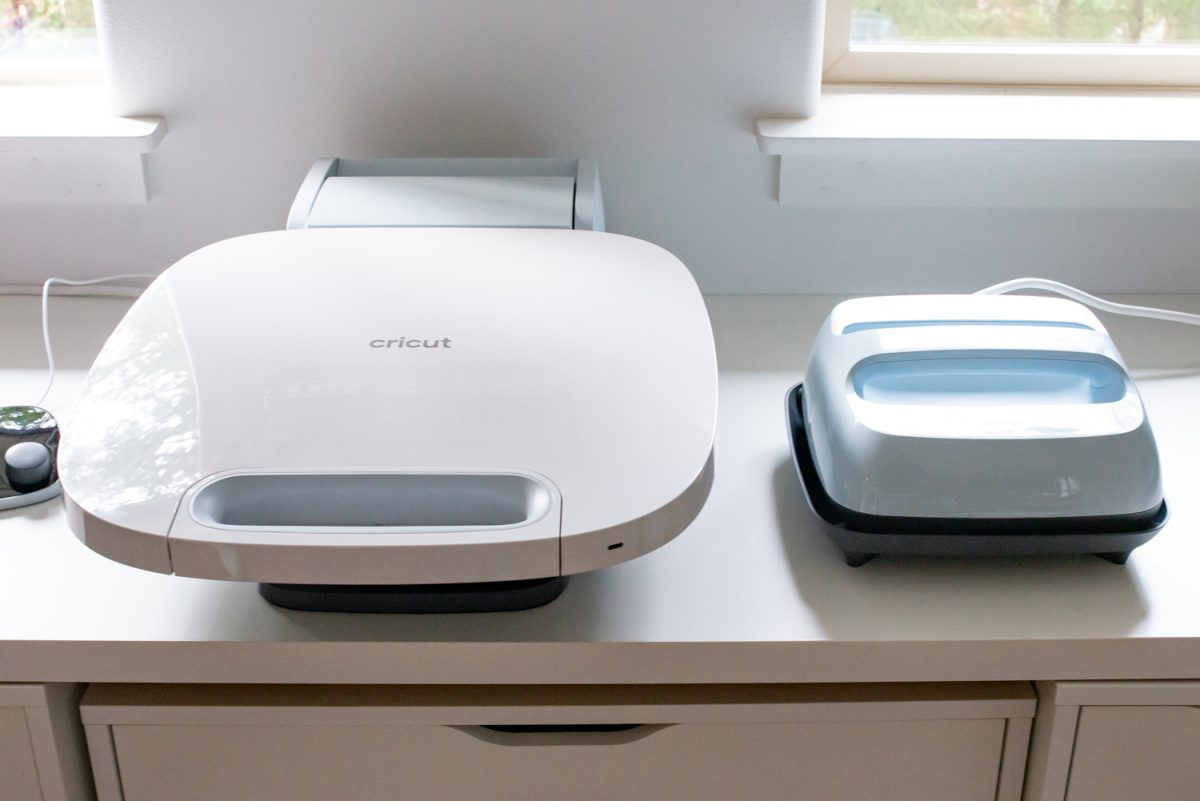
AutoPress is Cricut’s commercial-grade heat press that can be used for HTV and sublimation projects. It can adhere Cricut Infusible Ink, iron-on vinyl, and sublimation prints to T-shirts, blanks, coasters, and tote bags. Cricut AutoPress is a big machine, and compared to many competing Heat Presses, it is considerably bigger. However, unlike other big and industrial-grade Heat Presses, Cricut designed AutoPress to be smooth and sleek.
The dimension of this Cricut Heat Press machine is 16.63×26.07×6.62 (WDH), and weighs around 58 pounds. The AutoPress amalgamates a clamshell heat press and a swing-away heat press. There is not much to complain about the Cricut Auto Press design, and although being big, it can fit on a 25.5-deep standard counter and will also look nice in your studio. It can easily be tucked into spaces.
Setting Up & Using Cricut AutoPress
Setting up AutoPress is very easy. When you first open the box, you will find two boxes. In the first box, you will find the machine itself; in the second box, you will find the quick start guide, USB cord, power cord, and control pod. Via the USB cord, connect the AutoPress control pod. Go to Cricut Setup and follow the on-screen instructions to set up AutoPress. You can also set it up using the Design Space. Then create your project in Cricut Design Space and cut it; turn on the Cricut AutoPress and cut it on your Cricut machine. Turn on AutoPress and, using the control pod, set the time and temperature. Refer to the Cricut Heat Guide if you need clarification about the appropriate time and temperature for the specific material and blank.
On the base of AutoPress, place the shirt as flat as possible and close it. Press the handle down until it clicks. The timer will automatically preheat, and when the timer hits zero, the AutoPress will pop open. Let the shirt cool down, and place a piece of cardstock inside the shirt. Place the Infusible Ink image face down on the shirt using heat-resistant tape. On the top of the shirt, place a piece of butcher paper. Reset the control pod to 45 seconds and close the Press. Again, when the timer hits zero, the Press will pop open and let the shirt cool.
Cricut AutoPress Vs. Other Heat Presses
The overall function of AutoPress is the same as other heat presses, but Cricut has significantly improved its design and functions. These features make AutoPress stand out from the rest of the Heat Presses.
Auto Pressure
How good a Heat Press is, depends on temperature, time, and pressure. With traditional heat presses, you’ve to adjust the pressure via a crank at the top of the machine. But with the Cricut Auto Press, you don’t have to adjust pressure as the AutoPress has an auto pressure feature manually. On materials up to 2 inches thick, AutoPress automatically adjusts the pressure.
Unique Design
There are two types of heat presses in the market: the swing away press and the clamshell Press, both with advantages and disadvantages. Cricut took the heat presses’ best features and created a four-point hinge design. It allows you to do thicker projects like a swing-away press with the convenience and speed of a clamshell press.
You can close the top using your two fingers, and the AutoPress will automatically engage the motor and adjust the pressure automatically. Cricut didn’t make any compromises with safety. The top of the Auto Press is air-cooled, so unlike other heat presses, it doesn’t get hot.
Cricut AutoPress Vs. EasyPress
EasyPress is a small Cricut Heat Press that was launched in the year 2017. It falls between a traditional iron and a heat press. There are three different variants of EasyPress, such as EasyPress 2 and 3 and Cricut EasyPress Mini. Both Cricut AutoPress and EasyPress have their perks.
Benefits Of AutoPress
- As mentioned earlier, with EasyPress, you don’t have to worry about manually adjusting the pressure on the material.
- Unlike EasyPress, you don’t need to press items from the back.
- The heat plate on Cricut AutoPress is 15’’x12″, notably larger than the 12’’x10″.
Benefits Of Cricut EasyPress
- Due to its compact size and lightweight, it is easy to carry.
- EasyPress only takes up a little space.
- It heats up to 400 degrees in about 2 minutes or even less.
- EasyPress distributes heat evenly.
FAQs
Which is better, Cricut AutoPress or EasyPress?
They both have their advantages and disadvantages. Cricut AutoPress is designed to handle large projects, whereas EasyPress is more suitable for hobbyists. They both come with their Cricut heat guide. EasyPress heat guide includes the heat setting chart for all the models and variants.
What comes in the box of EasyPress?
In the box, along with the EasyPress machine, you will find the safety base, materials for the practice projects, warranty card, safety instructions, and EasyPress Guide. The setup process is straightforward.
Visit Site – cricut.com/setup
Source :- https://cricutapp.design/the-ultimate-guide-to-the-latest-cricut-heat-press-autopress/


Comments