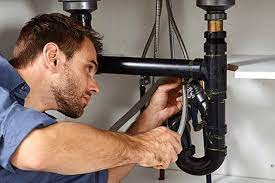
Properly fitting plumbing materials is essential for the functionality and longevity of any plumbing system. Whether you're tackling a small repair or a major installation project, having the right knowledge and techniques can make all the difference. In this guide, we'll walk you through the steps to fitting plumbing materials effectively and efficiently.
Step 1: Gather Your Materials
Before you begin any plumbing project, it's crucial to gather all the necessary materials and tools. This may include pipes, fittings, connectors, wrenches, sealants, and more. Make sure you have everything you need before starting to avoid interruptions midway through the project.
Step 2: Measure and Plan
Careful measurement and planning are vital to ensuring a successful plumbing project. Measure the dimensions of the area where the plumbing materials will be installed and determine the required lengths of pipes or tubing. Take into account any bends or turns that may be necessary and plan the layout accordingly.
Step 3: Cut Pipes to Size
Using a pipe cutter or a hacksaw, cut the pipes to the required lengths based on your measurements. Ensure that the cuts are clean and straight to facilitate proper fitting and prevent leaks. Deburr the cut edges using a file to remove any roughness that could damage seals or fittings.
Step 4: Prepare the Pipes and Fittings
Before fitting the pipes and fittings together, it's essential to prepare them properly. Clean the ends of the pipes and fittings thoroughly to remove any dirt, grease, or debris. This will help ensure a secure and watertight connection.
Step 5: Apply Sealant (If Necessary)
Depending on the type of plumbing materials you're using, you may need to apply sealant to the threads of the fittings to prevent leaks. Teflon tape or pipe joint compound can be used for this purpose. Apply a thin, even layer of sealant to the threads before assembling the fittings.
Step 6: Assemble the Pipes and Fittings
Carefully fit the pipes and fittings together according to your planned layout. Use a twisting motion to ensure a tight seal and prevent damage to the threads. Avoid over-tightening, as this can strip the threads or damage the fittings.
Step 7: Test for Leaks
Once the plumbing materials are fitted together, it's essential to test the system for leaks before completing the installation. Turn on the water supply and inspect all connections for signs of leakage. If any leaks are detected, tighten the fittings as necessary or apply additional sealant.
Step 8: Secure the Pipes
Once you're satisfied that the plumbing materials are properly fitted and leak-free, secure the pipes in place using pipe straps or hangers. This will help prevent sagging or movement that could compromise the integrity of the system.
Conclusion:
Fitting plumbing materials requires careful planning, precise measurements, and proper techniques. By following the steps outlined in this guide, you can ensure a successful plumbing project that functions reliably for years to come. Remember to always use high-quality materials, are you need plumbing service in phoenix click here take your time with each step, and test the system thoroughly before considering the job complete. With the right approach, you can tackle any plumbing project with confidence.


Comments