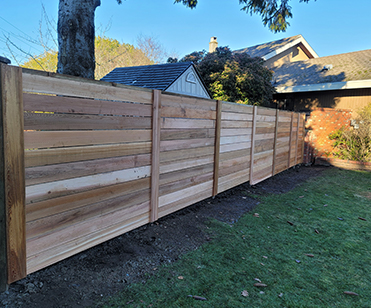
Installing a wooden fence is a popular choice for many homeowners due to its natural appearance, versatility, and the warmth it adds to the outdoor space. Whether you're looking to enhance privacy, secure your backyard, or simply add aesthetic value to your property, understanding the process of wooden fence installation is crucial. This comprehensive guide will walk you through the key steps, materials needed, and essential tips to ensure your wooden fence installation is successful and enduring.
Planning Your Wooden Fence Installation
Before you begin, thorough planning is essential to ensure your project goes smoothly and meets your expectations.
Check Local Regulations: First, check with your local building department to understand any specific regulations or permits required for fence installation in your area.
Determine the Purpose: Understand why you want a fence. Is it for privacy, security, or decorative purposes? This will influence the type of fence you choose.
Select the Right Material: While this guide focuses on wooden fences, it's worth noting that wood comes in various types, such as cedar, pine, and redwood. Each has its benefits and maintenance requirements.
Measure Your Area: Carefully measure the area where you plan to install the fence. This will help you purchase the correct amount of materials.
Materials and Tools Needed
To install a wooden fence, you will need the following materials and tools:
- Wooden posts, rails, and pickets
- Concrete mix
- Gravel
- Nails or screws
- Post hole digger or auger
- Level
- Hammer or nail gun
- Screwdriver or power drill
- String line
- Measuring tape
- Saw
Installation Steps
Mark the Fence Layout: Use stakes and string to mark out the line where your fence will go. This helps ensure your fence is straight and aligned properly.
Dig the Post Holes: Using a post hole digger or an auger, dig holes for the fence posts. The depth of the holes should be about one-third the height of the post, with an additional 6 inches for gravel for drainage. The standard distance between fence posts is 6 to 8 feet from center to center.
Add Gravel and Set Posts: Pour gravel into the bottom of each hole for drainage. Place the posts in the holes, ensuring they are level and straight. Use braces to keep them in place if necessary. Once satisfied, fill the hole with concrete, leaving a few inches from the top. Slope the concrete away from the post to allow for water runoff. Allow the concrete to cure according to the manufacturer's instructions.
Attach Rails to Fence Posts: Once the posts are secure, it’s time to attach the horizontal rails between the posts. For most designs, you will need two or three rails per section of fence. Use a level to ensure they are straight.
Install the Fence Pickets: Begin attaching the pickets to the rails with nails or screws, ensuring they are evenly spaced. Using a spacer can help maintain consistency in gap width between pickets.
Apply Finishing Touches: Once all the pickets are in place, you may choose to apply a stain or sealant to your fence. This not only enhances the fence's appearance but also extends its lifespan by protecting it against the elements.
Maintenance Tips
- Regularly check and repair any loose or damaged parts of the fence.
- Apply a new coat of paint, stain, or sealant every few years to protect the wood.
- Keep plants and shrubs away from the fence to prevent moisture and pest damage.
Conclusion
Wooden fence installation is a rewarding project that can significantly enhance the privacy, security, and aesthetic appeal of your property. By following these detailed steps and tips, you can ensure your wooden fence will stand strong and look great for years to come. Remember, the key to a successful wooden fence installation lies in careful planning, choosing the right materials, and maintaining your fence over time.


Comments