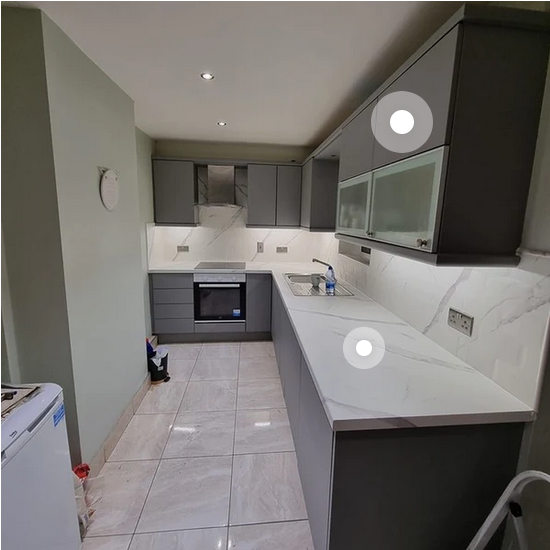
In the realm of interior design, a kitchen holds a special place. It's not just a place for culinary adventures; it's also the heart of the home, where memories are made and shared. However, giving your kitchen a makeover can often be a daunting and expensive task. Fortunately, there's a cost-effective solution that can breathe new life into your kitchen without breaking the bank: vinyl wrap.
Understanding Vinyl Wrap: A Versatile Design Solution
Vinyl wrap, commonly used in the automotive industry, has found its way into interior design due to its versatility and affordability. Essentially, it's a thin, adhesive-backed material that can be applied to various surfaces, including tables, countertops, cabinets, and even appliances. Available in a plethora of colors, patterns, and finishes, vinyl wrap offers endless possibilities for customization, making it an ideal choice for kitchen makeovers.
Benefits of Using Vinyl Wrap in Kitchen Design
One of the primary advantages of vinyl wrap is its cost-effectiveness. Compared to traditional renovation methods like replacing cabinets or countertops, vinyl wrap is significantly more budget-friendly. Moreover, it requires minimal time and labor to install, making it an attractive option for those looking to revamp their kitchen without the hassle of extensive renovations.
Additionally, vinyl wrap is durable and easy to maintain, making it suitable for high-traffic areas like the kitchen. Its protective layer not only enhances the longevity of the underlying surface but also makes cleaning a breeze. With just a gentle wipe-down, vinyl wrap surfaces can look as good as new, even after years of use.
Furthermore, vinyl wrap offers endless design possibilities. Whether you prefer a sleek, modern look or a rustic, farmhouse aesthetic, there's a vinyl wrap option to suit your style. From marble and granite patterns to wood grain and metallic finishes, the only limit is your imagination. Moreover, vinyl wrap can be easily removed and replaced, allowing you to update your kitchen's look as often as you like without committing to permanent changes.
Transforming Your Kitchen with Vinyl Wrap: Step-by-Step Guide
Transforming your kitchen with vinyl wrap is a straightforward process that can be completed in just a few simple steps. Here's a basic guide to get you started:
- Preparation: Begin by thoroughly cleaning the surface you plan to wrap. Remove any dirt, grease, or residue to ensure proper adhesion.
- Measurement and Cutting: Measure the dimensions of the surface and cut the vinyl wrap accordingly, leaving a slight overhang to ensure complete coverage.
- Application: Carefully peel off the backing of the vinyl wrap and position it onto the surface, smoothing out any air bubbles or wrinkles as you go. Use a squeegee or soft cloth to press the wrap firmly in place, ensuring a smooth and seamless finish.
- Trimming and Finishing: Once the wrap is applied, trim any excess material using a sharp utility knife or scissors. Pay attention to edges and corners to achieve a clean, professional look.
- Final Touches: After trimming, go over the entire surface once more, applying pressure to ensure proper adhesion. Clean any remaining residue or smudges for a flawless finish.
Conclusion
In conclusion, vinyl wrap for kitchen units offers a cost-effective and versatile solution for transforming your kitchen without breaking the bank. With its durability, easy maintenance, and endless design options, vinyl wrap allows you to achieve the kitchen of your dreams without the hassle of extensive renovations. Whether you're looking to update your countertops, cabinets, or appliances, vinyl wrap provides a quick and easy way to refresh your space and infuse it with your personal style. So why wait? Get creative and embark on your kitchen makeover journey with vinyl wrap today!


Comments