


In today’s fast-paced world, keeping your nails looking salon-fresh can be a challenge. A Gel manicure is the perfect solution for anyone who wants long-lasting, glossy nails without frequent trips to the salon. But did you know that you can achieve salon-quality results right at home?
At YOUGLO, we believe that beauty should be effortless and accessible. With the right tools and techniques, you can master the gel manicure at home and enjoy stunning nails that last for weeks. In this comprehensive guide, we’ll walk you through everything you need to know about achieving the perfect gel manicure at home—step by step.

What Is a Gel Manicure?
A gel manicure is a type of nail treatment that uses a special gel-based polish, which is then cured under an LED or UV lamp to create a long-lasting, chip-resistant finish. Unlike regular nail polish, gel polish can last for up to three weeks without chipping or peeling. It’s the go-to choice for those who love a polished, professional look with minimal maintenance.
Why Choose a Gel Manicure at Home?
- Cost-Effective: A salon gel manicure can be expensive. Doing it at home saves you money in the long run.
- Convenience: No need to schedule appointments—do your nails whenever you want.
- Customization: You have complete control over colors, designs, and nail shapes.
- Hygiene: Using your own tools ensures a safer and cleaner experience.
What You Need for a Gel Manicure at Home
To achieve salon-quality results, you’ll need the right products and tools. Here’s a checklist:
- Gel Base Coat: This ensures that the gel polish adheres properly to your nails.
- Gel Nail Polish: Choose your favorite shades for a beautiful, long-lasting manicure.
- Gel Top Coat: Seals the color and provides a glossy, protective finish.
- LED or UV Lamp: Essential for curing the gel polish and making it durable.
- Nail File & Buffer: Prepares the nails for polish application.
- Cuticle Pusher & Nippers: Helps in grooming your cuticles for a clean look.
- Rubbing Alcohol or Gel Cleanser: Removes any residue and ensures a smooth finish.
- Cotton Pads & Lint-Free Wipes: Used for cleaning and removing excess oils.
Step-by-Step Guide to a Gel Manicure at Home
Step 1: Prep Your Nails
Proper nail preparation is the key to a long-lasting gel manicure at home.
- Remove any old nail polish with an acetone-free remover.
- Trim and shape your nails using a nail file.
- Gently push back your cuticles with a cuticle pusher. Trim any excess cuticle if necessary.
- Buff the surface of your nails to remove shine and create a smooth base.
- Wipe nails with rubbing alcohol or gel cleanser to remove any dust and oils.
Step 2: Apply the Base Coat
- Apply a thin layer of gel base coat on your nails.
- Avoid applying it too thick, as it can cause lifting or peeling.
- Cure under an LED or UV lamp for the recommended time (usually 30-60 seconds).
Step 3: Apply the Gel Color
- Choose your favorite gel polish color and apply a thin, even coat.
- Cure under the LED/UV lamp for 30-60 seconds.
- Apply a second coat for a richer color and cure again.
Step 4: Apply the Top Coat
- Seal the color with a gel top coat to add shine and protection.
- Cure under the lamp for 60 seconds to ensure it sets completely.
Step 5: Cleanse and Moisturize
- If your gel polish leaves a sticky layer, wipe it off with a lint-free pad soaked in rubbing alcohol.
- Apply cuticle oil and hand cream to keep your nails and skin hydrated.
How to Make Your Gel Manicure Last Longer
A gel manicure at home can last up to three weeks if done correctly. Here are some tips to extend its longevity:
- Avoid Water Exposure: Keep nails dry for at least an hour after application.
- Wear Gloves: Use gloves when doing household chores to protect your manicure.
- Apply Cuticle Oil Daily: This prevents dryness and peeling.
- Use Gentle Nail Care: Avoid using nails as tools to open cans or scrape things.
- Avoid Peeling Off Gel Polish: Always remove it properly to prevent nail damage.
How to Remove a Gel Manicure at Home
While a gel manicure is long-lasting, proper removal is essential to keep your nails healthy.
What You Need:
- Acetone
- Cotton balls
- Aluminum foil
- Cuticle pusher
- Nail buffer
Step-by-Step Removal Process:
- Buff the Top Coat: Gently file the surface to break the seal.
- Soak Cotton in Acetone: Place it on the nail and wrap it with foil.
- Wait for 10-15 Minutes: This allows the gel to loosen.
- Gently Push Off the Gel: Use a cuticle pusher to remove softened polish.
- Hydrate Your Nails: Apply cuticle oil and hand cream after removal.
Best Gel Manicure Kits for Beginners
If you’re new to gel Manicure at home, investing in a good kit makes the process easier. Look for kits that include:
- Base coat, top coat, and gel colors
- An LED/UV lamp
- Nail prep tools (files, buffer, cuticle pusher)
- Remover wraps and lint-free wipes
Looking for some inspiration? Here are the latest nail trends:
- Minimalist Nude Tones: Classic and elegant for any occasion.
- French Tips with a Twist: Try colored or glittery tips instead of white.
- Chrome & Metallic Nails: Perfect for a futuristic, glam look.
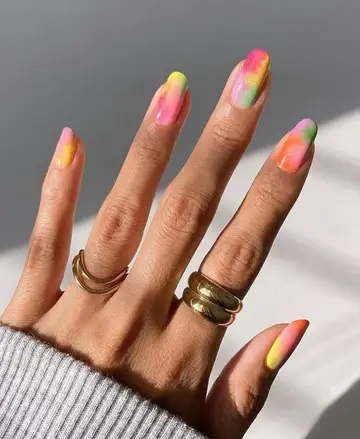
- Ombre Nails: A gradient effect that blends two or more colors seamlessly.
- Abstract Art: Unique patterns and swirls for a modern aesthetic.
Final Thoughts
A gel manicure at home is an easy and cost-effective way to maintain beautiful nails. With the right tools, techniques, and a little practice, you can achieve a salon-worthy finish right from the comfort of your home.
At YOUGLO, we’re committed to making nail care effortless and enjoyable. Explore our range of nail care products to create the perfect gel manicure anytime, anywhere!
Comments