Introduction:
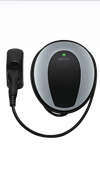
Installing your Easee Charge electric vehicle (EV) charging station is a crucial step towards adopting sustainable transportation and reducing your carbon footprint. A well-executed installation ensures safe and efficient charging for your EV, enhancing convenience and peace of mind. This comprehensive guide aims to provide step-by-step instructions for installing your Easee Charge, covering essential aspects such as preparation, mounting, electrical connections, and testing.
Understanding Easee Charge:
Before diving into the installation process, it's essential to understand the features and benefits of the Easee Charge EV charging station. Designed for both residential and commercial use, Easee Charge offers advanced functionalities such as Wi-Fi connectivity, smart charging capabilities, and compatibility with various EV models. Its sleek design and user-friendly interface make it an ideal choice for EV owners looking for reliable and efficient charging solutions.
Step-by-Step Installation Guide:
- Preparation:
- Start by selecting a suitable location for installing your Easee Charge. Consider factors such as proximity to your EV parking spot, accessibility, and available electrical infrastructure.
- Ensure that the chosen location meets the necessary safety requirements, including adequate ventilation, protection from moisture, and compliance with local regulations.
- Gather all the tools and materials required for the installation, including mounting hardware, electrical wiring, conduit, and junction boxes.
- Shut off the power supply to the installation area at the circuit breaker to prevent electrical accidents during the installation process.
- Mounting:
- Follow the manufacturer's guidelines for mounting your Easee Charge securely to the wall or mounting surface. Use appropriate mounting hardware and ensure that the charging station is level and stable.
- Position the charging station at a suitable height for easy access and visibility, considering factors such as cable length and user convenience.
- Double-check the mounting location to ensure that it provides sufficient clearance around the charging station for proper ventilation and cable management.
- Electrical Connections:
- Before proceeding with electrical connections, familiarize yourself with the electrical specifications of your Easee Charge unit, including voltage, current rating, and wiring requirements.
- Install a dedicated circuit breaker of the appropriate size and amperage rating for your Easee Charge unit. Consult a qualified electrician if necessary to ensure compliance with local electrical codes.
- Connect the electrical wiring from the circuit breaker to the terminal block on the back of the charging station, following the manufacturer's wiring diagram and instructions.
- Use proper wiring techniques, such as stripping insulation, crimping terminals, and securing connections with wire nuts or terminal blocks. Ensure that all connections are tight and secure to prevent electrical hazards.
- Network Setup:
- If your Easee Charge unit includes Wi-Fi connectivity, follow the manufacturer's instructions to set up the network connection. This typically involves connecting the charging station to your home or office Wi-Fi network using a smartphone or computer.
- Configure the network settings and user preferences through the Easee Charge mobile app or web portal. Customize charging schedules, monitor energy consumption, and receive notifications for charging events or system updates.
- Ensure that the network connection is stable and reliable to enable seamless communication between the charging station, EV, and online platform for remote monitoring and control.
- Testing and Commissioning:
- Once the installation is complete, conduct thorough testing to ensure that your Easee Charge unit is functioning correctly and safely.
- Power on the charging station and verify that the LED indicators display the appropriate status signals, such as power availability, charging status, and error codes.
- Test the EV charging cable and connector for proper operation, including locking mechanisms, release buttons, and LED indicators.
- Verify that the charging station communicates with your EV and initiates charging sessions as expected. Monitor the charging process for any abnormalities or malfunctions.
- If necessary, consult the user manual or contact customer support for troubleshooting guidance and assistance with resolving any issues encountered during testing.
Conclusion:
Installing your Easee Charge installation EV charging station is a straightforward process that can be completed with careful planning, attention to detail, and adherence to safety guidelines. By following the step-by-step instructions provided in this comprehensive guide, you can ensure a smooth and successful installation experience. Remember to prioritize safety at all times, seek professional assistance if needed, and enjoy the convenience of fast and reliable charging for your electric vehicle.


Comments