Introduction:
After a severe storm, one of the most critical tasks for homeowners is to inspect their roofs for damage. Storms can wreak havoc on roofing systems, leading to issues like leaks, broken shingles, and structural damage that may not be immediately noticeable. Conducting a post-storm roof inspection helps ensure that any potential problems are identified early, allowing for timely repairs and avoiding more extensive damage in the future. This article outlines the steps to effectively inspect your roof for damage after a storm, ensuring the safety and integrity of your home.
1. Prioritize Safety Before Inspection
Before starting a roof inspection, ensure the storm has fully passed, and the weather conditions are safe. Hazards such as live power lines, sharp debris, or slippery surfaces can make inspecting your roof dangerous. If there are any signs of significant structural damage, such as sagging areas or large debris like tree branches, avoid accessing the roof and contact a professional immediately.
Using a sturdy ladder and proper safety gear like non-slip shoes is essential if you plan to inspect your roof yourself.
2. Conduct a Ground-Level Survey
Start your inspection by walking around your home and observing the roof from the ground. Look for large debris, broken or missing shingles, and any apparent damage to flashing around chimneys or skylights. This ground-level survey can help you spot obvious damage before moving onto more detailed inspection steps.
If you have binoculars, use them to get a closer view of your roof without needing to climb a ladder right away. This can help you identify problem areas more safely.
3. Inspect the Shingles
Once you have safely accessed the roof, check the shingles closely. High winds, rain, and hail can dislodge shingles or cause them to crack and break. Pay special attention to areas where shingles may have curled or been completely torn off. Granule loss is another sign of storm damage—if you notice excessive granules either on the roof or in the gutters, the shingles may need replacement.
Hail can also create small, circular dents on shingles, weakening the roof’s protective layer and making it more susceptible to water damage.
4. Examine the Gutters and Downspouts
Storm damage often affects not only the roof but also the gutters and downspouts. Ensure the gutters are intact and free of debris, as clogged or damaged gutters can lead to water pooling on the roof and eventually causing leaks. Look for signs of granules from the shingles in the gutters, which could indicate that the shingles have been compromised.
Also, make sure downspouts are properly directing water away from your home to avoid foundation problems.
5. Check for Leaks Inside the Home
Internal signs of storm damage are just as important as external ones. Look for water stains on ceilings, walls, or in the attic, which may suggest a leak. Dark spots or sagging areas in the ceiling could indicate that water has already infiltrated the roofing structure. Inspect your attic for damp insulation, mold, or any unusual smells that may point to hidden moisture problems.
6. Assess Roof Flashing and Vents
Roof flashing, the metal strips around chimneys, vents, and skylights, can be damaged during storms, leading to potential water penetration. Inspect these areas carefully for loose or torn flashing. Any visible gaps or corrosion around vents and skylights should be addressed immediately to prevent leaks. If you notice cracked seals around these features, consider applying a sealant or calling a professional for repairs.
7. Look for Structural Damage
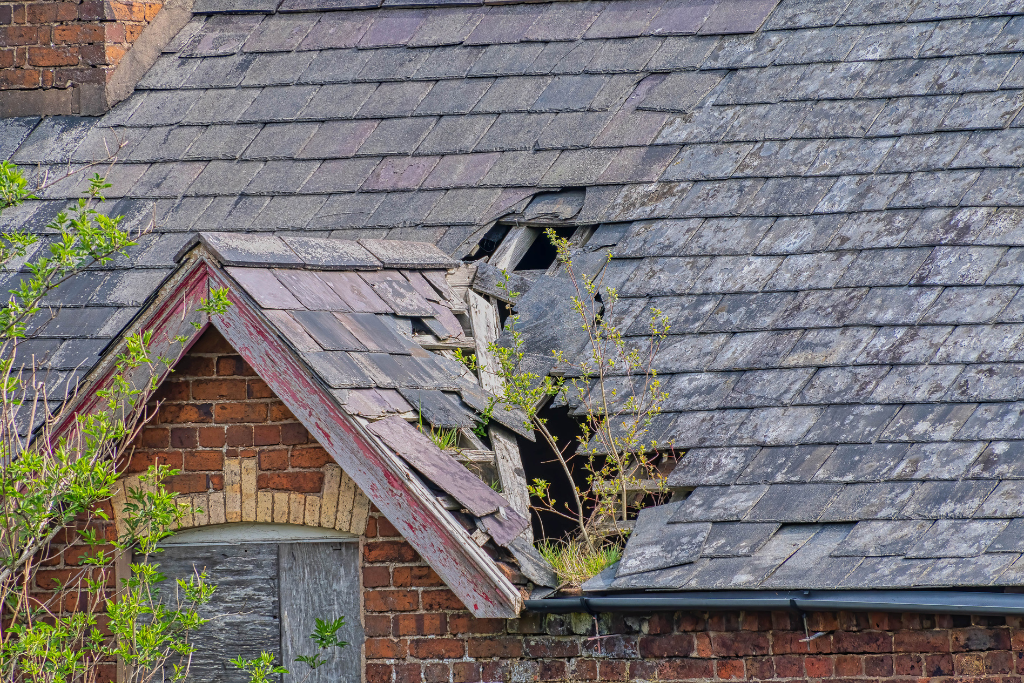
Strong winds and heavy precipitation can compromise the roof’s structural integrity. Inspect the roof’s surface for sagging, uneven areas, or visible damage to rafters or trusses, especially if you live in a region prone to severe weather. Structural issues should always be handled by a professional, as they could pose serious risks to your home’s safety.
8. Hire a Professional Roof Inspector
While a DIY inspection can reveal visible storm damage, some issues require a professional’s expertise. A certified roof inspector will thoroughly assess the roof and identify problems that may not be evident to the untrained eye, such as hidden leaks or subtle structural damage. If you plan to file an insurance claim, a professional inspection can provide documentation that supports your claim and ensures you receive adequate coverage for repairs.
Conclusion:
Inspecting your roof for damage after a storm is a crucial step in protecting your home and preventing costly repairs. By prioritizing safety, conducting a thorough inspection from both the ground and rooftop, and checking for internal signs of damage, you can identify issues early. While many problems can be spotted by homeowners, a professional inspection offers added security, ensuring that all damage is properly addressed. Taking swift action after a storm will help maintain the longevity of your roof and safeguard your home from further damage.


Comments