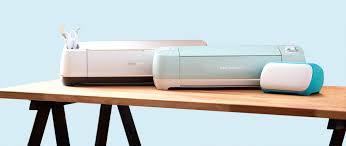
The Cricut Design Space App is an official software that helps to establish communication between the Cricut machine and computer/mobile. In the Cricut Design Space, you can design anything you like, also upload images, shapes, fonts, etc. It contains features such as Weld, Attach, Slice, and Flatten. Each of these tools has specific functions and features. The Flatten is one of the 5 essential parts of the design tools. It is helpful while working layers on Design Space. So, let us look at how to use Flatten in Cricut Design Space.
What is the Function of the Flatten Tool?
Before we proceed with the steps regarding the use of Flatten, let us look at its functions.
- The main purpose of it is that it flattens down all the layers into a single layer.
- Also, it removes all the internal cut lines that are in the layers.
- It changes the newly merged image into a Print Then Cut function rather than just another cut layer.
When to Use a Flatten Tool?
The flatten tool helps combine multiple Cut layers into one layer that can be printed out. You mainly use this function while preparing your design for Print Then Cut projects. However, you can use the Flatten tool in any design where you must join two or more separated shapes into a single-layer shape.
For example, you will use the Flatten function to combine texts and shapes in multiple layers to make labels with printable vinyl. Or combine several image layers to create colorful, printable designs that you can cut out using the Print Then Cut feature.
How to Use the Flatten Tool?
After understanding its functions and features, when you need to use the Flatten tool, we will now look at how to use Flatten in Cricut Design Space.
- The first step is to design your projects or import designs. Remember, you can only use Flatten when you have a design with multiple layers.
- That’s why you need to have more than one layer while you design.
- Now, to highlight all the cut pieces of an image. To highlight them, you select the layers on the canvas by clicking on the image. However, you can highlight them by selecting the letters in the layers panel.
- Once all the layers are highlighted, we can use the Flatten tool.
- Now, you must click on the Flatten at the bottom of the layers panel.
- Afterward, you might notice the changes in coloring. It is because all the lines are changing from cut to print.
- Before you use the Print Then Cut feature, you need to add offsets to the image.
- So, add offsets individually to each image. Here, you need to select the particular image to which you want to add an offset and click Offset.
- Further, change the corner shape of the image to rounded or rectangle and the width as per your design.
- Next, highlight the flattened image again, and a new offset will be created.
- After selecting all the cut pieces and giving an offset to them, you need to click Flatten again.
- Now, your final design is complete. Selecting the Flatten tool again is important, as the Cricut will cut two lines, one around the design and another around the Offset.
Conclusion
It is important to remember that the Flatten tool works on one or more layers. Also helpful in combining multiple layers into a single printable image. Further, it tells Design Space that the set of images is to be printed as a single image, and it needs to be just one cut around the outline. For beginners, it can be difficult. So, this tutorial blog will help you on how to use flatten in Cricut Design Space.
FAQs
Why use the Flatten for Print layers?
Before printing the image, you must change it from a Cut later to a Print layer. Because most images and texts within the Cricut Design Space are Cut layers, a Cricut machine will cut around each image. So, by using the Flatten tool, the Design Space will combine the selected layers into a single printable image.
Is it possible to Unflatten an image in Cricut Design Space?
Yes, you can Unflatten the layers after using the Flatten tool. The Unflatten tool becomes active once you select a Flattened layer. Also, you can use this tool anytime, even after saving your project. However, it isn’t a reverse action to Flatten, but it does separate the image into different layers. From there, you will be able to edit them individually.
What is the difference between Flatten and Weld?
The Weld and Flatten are part of five essential features of Cricut Design Space. At first glance, they both have similar functions but are used for completely different purposes. The role of the Weld is that it combines multiple Cut layers into a single Cut layer. However, when you use Flatten too, it combines various Cut layers into a single Print Then Cut layer. So, the Cut layer produced by Weld differs from that of Flatten.
Visit: Cricut design space
Source: Cricut Design Space App


Comments