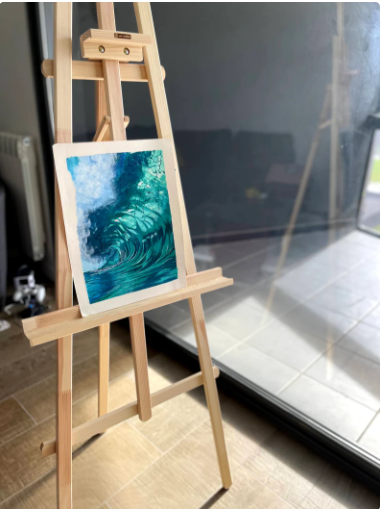
Acrylic painting is a versatile medium that allows artists to create a wide range of effects, including capturing the beauty and movement of waves. Painting waves in acrylic can be a captivating and enjoyable experience, allowing you to express the energy, colors, and textures of the ocean.
Here are some steps to guide you in creating a waves acrylic painting:
Gather your materials: You'll need acrylic paints in various shades of blue, white, and possibly other colors for the sky or any additional elements. You'll also need brushes, a canvas or painting surface, palette, water for rinsing brushes, and a palette knife (optional).
Prepare your canvas: Apply a layer of gesso or primer to your canvas to create a smooth surface and ensure the paint adheres well. Allow it to dry before moving on.
Plan your composition: Decide on the size and placement of the waves within your painting. You might sketch a basic outline with a pencil or use masking tape to define the boundaries.
Start with the background: Begin by painting the sky or any other elements that are behind the waves. Use lighter shades of blue, blending them together to create a gradient effect. You can also incorporate other colors like pink, orange, or yellow for a sunset or sunrise scene.
Paint the base layer of the water: Choose a mid-tone blue and apply it to the areas where the water will be. Use broad brushstrokes to suggest the movement of the waves, keeping in mind the direction they're flowing.
Add highlights and shadows: Use lighter shades of blue and white to create highlights on the crest of the waves. Add some darker shades or even touches of green to represent the shadows and depth in the troughs. Blend the colors together smoothly to create a realistic look.
Create texture: To give your waves more dimension and texture, you can use a palette knife or a stiff brush to add impasto effects. Apply thicker strokes of paint to build up the foam and splashes on the wave tops.
Detailing: Once you're satisfied with the overall shape and form of the waves, you can add finer details. Use smaller brushes to paint foam, spray, and the patterns created by the movement of the water. Pay attention to the light and reflection, as this will enhance the realism of your painting.
Finishing touches: Take a step back and evaluate your painting. Make any necessary adjustments or add any final touches to bring the artwork together. Sign your painting in the corner once you're happy with the result.
Remember, painting waves with acrylics is a creative process, and there's room for experimentation and personal style. Observe reference photos, study the movement of waves, and let your imagination guide you. Enjoy the process and have fun capturing the beauty of the ocean on canvas!


Comments