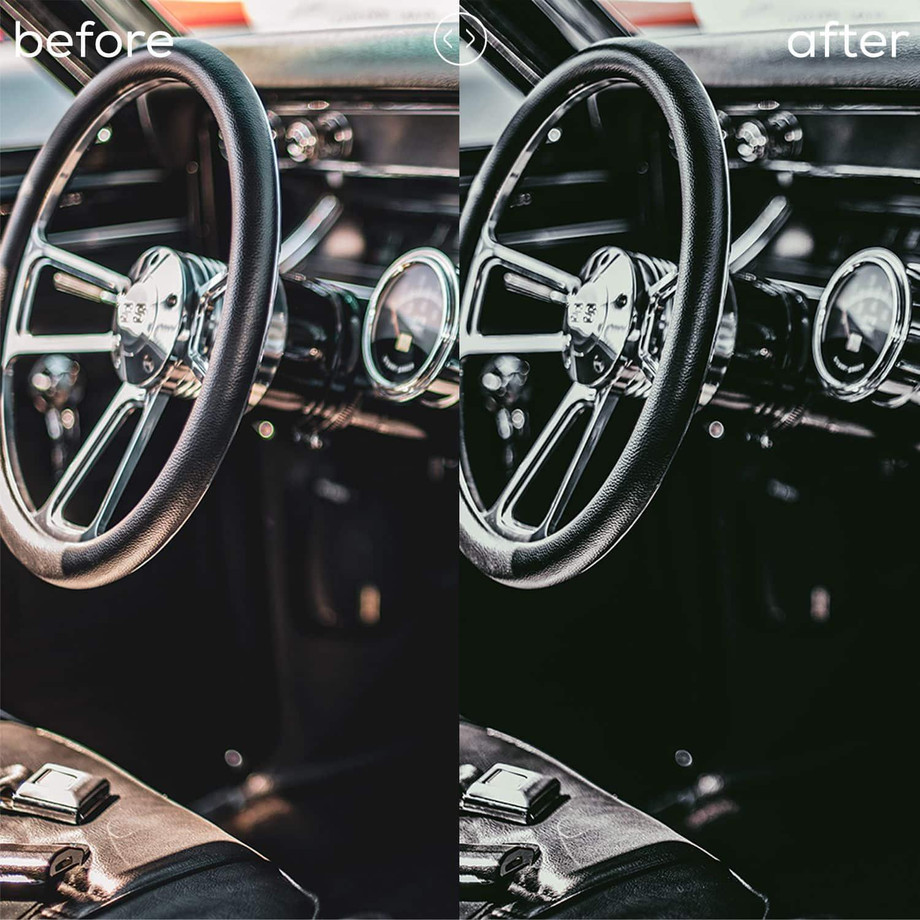
Photography is a powerful medium for storytelling, and editing plays a crucial role in shaping the narrative. Dark tone editing in Adobe Lightroom is a popular style that can create mood, depth, and atmosphere in your photos. In this comprehensive guide, we will delve into the art of dark tone editing, offering tips, techniques, and insights to help you master this evocative style using Adobe Lightroom.
Understanding Dark Tone Editing
Dark tone editing is a photographic style characterized by deep shadows, reduced highlights, and a rich, moody atmosphere. It is often used to convey emotions, drama, and intensity in photos. Here's how to achieve dark tone edits in Lightroom:
Start with Exposure:
Begin by reducing the overall exposure to darken the image.
Adjust the Exposure slider in the Develop module to your desired level. Be mindful not to overdo it, as you don't want to lose too much detail.
Tweak Contrast:
Increase the Contrast slider slightly to enhance the difference between shadows and highlights.
Experiment with the Contrast adjustment to find the right balance for your image.
Work on the Tone Curve:
The Tone Curve is a powerful tool for controlling tones in your image.
Create an S-curve by adding a point in the shadows to darken them and another in the highlights to brighten them slightly.
Fine-tune the curve to achieve the desired contrast and mood.
Adjust Blacks and Whites:
Dark tone edits often involve deep blacks and muted whites.
Reduce the Blacks slider to add depth to the shadows, and lower the Whites slider to avoid blown-out highlights.
Enhance Clarity and Texture:
Slightly increase Clarity and Texture to bring out detail and texture in your image.
These adjustments can add depth and character to dark tone photos.
Manage HSL (Hue, Saturation, and Luminance):
Use the HSL panel to fine-tune the colors in your image.
Reducing the luminance of certain colors can help achieve the desired mood.
Apply Graduated Filters and Radial Filters:
Graduated and Radial Filters can be used to selectively adjust areas of your image.
For dark tone edits, consider darkening the sky with a Graduated Filter or drawing attention to a specific subject with a Radial Filter.
Use the Vignette Tool:
Apply a subtle vignette to draw the viewer's eye toward the center of the image.
Adjust the Amount and Feather sliders to control the strength and softness of the vignette.
Finalize with Split Toning:
Split Toning allows you to add color tones to the shadows and highlights.
Experiment with different color combinations to achieve a unique look.
Save Your Preset: - Once you've crafted your dark tone edit, consider saving it as a preset. Presets can be applied to other photos with a single click, saving you time and ensuring consistency in your editing style.
Tips for Effective Dark Tone Editing
Maintain Detail: While dark tone editing often involves deep shadows, be cautious not to lose too much detail. Pay attention to the histogram to ensure a balanced tonal range.
Experiment with Colors: Dark tone edits can be more compelling when certain colors are allowed to pop. Consider selectively desaturating or enhancing specific colors to create visual interest.
Embrace Texture: Dark tone editing is an excellent opportunity to highlight texture in your photos. Experiment with Texture and Clarity adjustments to bring out detail.
Customize Your Workflow: Every photo is unique, so adapt your editing workflow to suit each image's characteristics and the mood you want to convey.
Study Inspiration: Look at the work of photographers known for their dark tone edits to gain inspiration and insights into the style.
For More Info:-
Free Mobile Lightroom Presets Bright
Food Blogger Lightroom Presets
Lightroom Black Preset Download


Comments