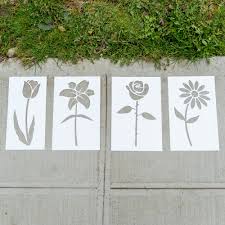
Creating custom stencils is an innovative way to add a unique touch to various projects, ranging from home decor to business branding. This guide will delve into the world of custom stencils, detailing how you can make your own, the benefits they offer, and how to use them effectively.
Why Use Custom Stencils?
Personalization and Creativity
Custom stencils allow for unparalleled personalization. Whether you want to add a bespoke design to your living room wall or create branded merchandise, stencils offer a flexible solution to bring your vision to life.
Cost-Effective Solutions
Creating your own stencils can save you money compared to purchasing pre-made designs, especially for unique or large-scale projects. You only need to invest in the initial materials and tools.
Versatility
Custom stencils can be applied to various surfaces, including walls, fabric, wood, glass, and metal. This versatility makes them ideal for a wide range of applications, from home decor to professional crafts.
Materials and Tools Needed
To create custom stencils, you'll need:
Stencil Material: Mylar sheets, stencil film, acetate, or thick cardstock. Mylar is a popular choice for its durability and flexibility.
Cutting Tools: Sharp craft knives or precision cutting tools. Cutting machines like Cricut or Silhouette can handle intricate designs.
Cutting Mat: Protect your work surface with a self-healing cutting mat.
Adhesive Spray: Keeps your stencil in place during application.
Design Template: Draw or print your stencil design on paper.
Tape: Painter's tape or masking tape to secure your stencil.
Paint and Applicators: Depending on your project, you might need acrylic paint, fabric paint, spray paint, and appropriate applicators such as brushes or sponges.
Creating Custom Stencils: A Step-by-Step Guide
Design Your Stencil
Start with a clear idea of your design. Use graphic design software like Adobe Illustrator, Inkscape, or free online tools to create or modify your stencil template. Keep the design bold and simple for ease of cutting and application.
Transfer the Design
Print your design and secure it to your stencil material with tape. If using a cutting machine, load your design into the software and follow the machine’s instructions to cut the stencil directly from the material.
Cut Out the Stencil
Carefully cut along the lines of your design with a craft knife, ensuring you work on a cutting mat. Precision is key, especially for intricate designs, so take your time to avoid mistakes.
Test the Stencil
Before using your stencil on your final project, test it on a scrap piece of material. This allows you to check for any flaws in the design and make necessary adjustments.
Apply Adhesive Spray
Lightly spray the back of your stencil with adhesive spray to prevent shifting during use. Let the adhesive become tacky before positioning the stencil on your project surface.
Secure the Stencil
Use painter’s tape to firmly secure the stencil in place. Ensuring the stencil is flat and secure prevents paint from bleeding under the edges.
Apply the Paint
Apply paint using a brush, sponge, or spray paint. Use a dabbing or stippling motion to prevent paint from seeping under the stencil edges. Apply multiple thin layers, allowing each layer to dry before applying the next.
Remove the Stencil
Carefully lift the stencil away while the paint is still slightly wet to prevent it from sticking. If needed, use a small brush to touch up any areas where the paint may have bled.
Clean and Store Your Stencil
Clean your stencil immediately after use to remove any paint residue. Most stencils can be cleaned with soap and water. Store your stencil flat or rolled up to maintain its shape for future use.
Tips for Successful Stenciling
Choose High-Quality Paint: Invest in good quality paint suitable for your project surface to ensure longevity and a professional finish.
Practice First: If you’re new to stenciling, practice on scrap material to perfect your technique.
Use Adequate Lighting: Good lighting helps you see the fine details and ensures precision while cutting and painting.
Experiment with Techniques: Don’t hesitate to try different painting techniques, like blending colors or adding texture, to achieve unique effects.
Applications of Custom Stencils
Home Decor
Custom stencils can transform your living space with personalized wall art, custom-painted furniture, and unique decorative accents. Use stencils to create borders, murals, or intricate patterns on walls and furniture.
Clothing and Accessories
Personalize your wardrobe with custom stencils. Design your own t-shirts, bags, and other accessories with unique patterns and logos.
Business Branding
For businesses, custom stencils offer an affordable way to brand packaging, promotional materials, and office decor. Stencil your logo on bags, boxes, or walls to reinforce brand identity.
Crafts and Gifts
Handmade gifts gain an extra special touch with custom stencils. Create personalized gifts like custom-painted mugs, signs, and artwork for friends and family.
Conclusion
Custom stencils provide endless possibilities for personalization and creativity. By following this guide, you can design, create, and use stencils effectively to achieve professional-looking results in any project. Whether you’re decorating your home, customizing clothing, or branding your business, custom stencils are a versatile and valuable tool for any DIY enthusiast or professional artist.


Comments